Note: this post is outdated, you should take a look to this more recent article.
This post aims to present how to create a simple control object, namely a slider, using the CCControl I presented in the previous article.
To illustrate how to incorporate the CCControl into your project and how to use it, I decided to start with the very simple CCSlider from the cocos2d-iphone-extensions. This object provides a quick way to add a slider into a Cocos2d project.
In the first part I’m going to show you how to integrate the CCControl instead of using a protocol to send the new value, and in a second part I’ll make some improvements to the code more robust and to make it easier to read (and so more maintainable).
Integration of CCControl
Project Setup
Firstly if you don’t have the cocos2d-iphone-extensions, you have to download it using git. The cocos2d-iphone-extensions home page has all instructions on how to download it and its submodule (cocos-2d), but I’ll post the steps here for quick reference:
git clone git@github.com:cocos2d/cocos2d-iphone-extensions.git
cd cocos2d-iphone-extensions

# init cocos2d-iphone submodule in order to build & run the tests.
git submodule update --init
To be sure that all is ok, open the project (iOS or Mac according to your preferences), set the active target on the CCSliderTest and run it. It should work! (if not, check if the cocos2d submodule is set properly)
Once the cocos2d-iphone-extensions ready to use, download the CCControl files (.h and .m) here: CCControl repository.

Then add these files into the project:
- Go into Xcode.
- Show the Project navigator in the right sidebar.
- Control-click on your project file.
- Choose Add files to ‘cocos2d-extensions-ios’.
- Browse to your CCControl files, check CCSliderTest target and click Add (Check the “copy items” option).
Now open the CCSlider.h into the extension folder and include the CCControl.h like that:
#import "cocos2d.h"
#import "CCControl.h"
Then replace the superclass of the CCSlider by the CCControl (which extends CCLayer too).
@interface CCSlider : CCControlCompile and check that all it’s ok.
The project is now set up correctly and we are able to work with the CCSlider and the CCControl.
Integrating the CCControl
First of all we are going to replace the delegate logic by the target-action pattern supplied with the CCControl.
CCSlider
In the header (.h):
- Start by removing the CCSliderControlDelegate protocol from the header.
- Then remove the “id<CCSliderControlDelegate> delegate;” defines in the interface.
- And to finish remove the corresponding (delegate) property directive.
In the implementation (.m):
- Remove the “@synthesize delegate;”.
- Then in the “setValue:” method, replace “[delegate valueChanged:value tag:self.tag];” line by:
[self sendActionsForControlEvents:CCControlEventValueChanged];The “sendActionsForControlEvents:” method calls all the target actions which have been registered for the given control event (here CCControlEventValueChanged).
The CCSlider is already… ready! It was really easy no?!
We just needed to remove the delegate and replace its defined method by one provides by the CCControl. This saves a few lines of code and mainly it has made our life easier with the management of receivers (registration and sending messages).
So now we are going to modify the slider test file.
CCSliderTestLayer
Go to CCSliderTestLayer header, and remove the protocol “<CCSliderControlDelegate>” defines in the interface:
@interface CCSliderTestLayer : CCLayerOpen its implementation:
- Firstly, replace the “valueChanged:tag:” method by this:
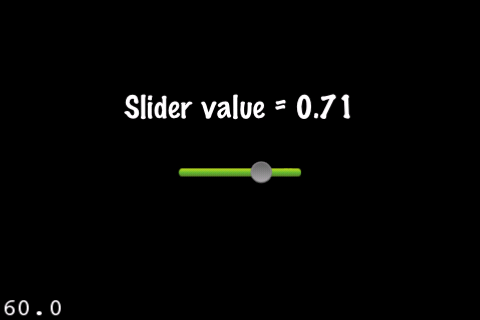
- (void)valueChanged:(CCSlider *)sender
{
     // Get label.
     CCLabelTTF *label = (CCLabelTTF *)[self getChildByTag: kLabelTag];

     // Change value of label.
     label.string = [NSString stringWithFormat:@"Value = %f", [sender value]];
}
When the value of the slider will change, it’ll call this method passing itself as parameter. To retrieve the slider’s value we just have to call its accessor.
- Then in the init method, remove this line “slider.delegate = self;” and replace it by:
[slider addTarget:self action:@selector(valueChanged:) forControlEvents:CCControlEventValueChanged];This will register the CCSliderTestLayer’s “valueChanged:” selector for the CCControlEventValueChanged event. It means that if the value of the slider changes, the “valueChanged:” method on the target will be called with the slider as parameter.
It’s finished! Now compile the project and all should work as before!
As you can appreciate, it’s really easy to integrate a CCControl into your project. You just have to extend the CCControl class, send an event when you need, and the side of the receiver, listen to this event.
In the following part we’ll see how to improve the CCSlider.
Improve it!
Using the slider you may notice few problems like the fact that the value is changed only when we released the button or the fact that the thumb does not hold correctly when you move too fast. In this section I will so provide some small fix to improve it.
To begin go to the CCSlider implementation file. We are going to add a private category to the class by adding this above the @implementation:
@interface CCSlider ()
@property (nonatomic, assign) float minX, maxX;
@property (nonatomic, retain) CCMenuItem *thumb;
@property (nonatomic, retain) CCSprite *bg;

@end
For the moment we have just defined private properties for all instance variables, but later we’ll add some private methods.
Next, we need to add the synthesize directives:
@synthesize minX, maxX;
@synthesize thumb = _thumb;
@synthesize bg = _bg;
@synthesize value;
Ok, so now let’s going to modify the “initWithBackgroundSprite:thumbMenuItem:” method to take in consideration this changes:
- (id)initWithBackgroundSprite:(CCSprite *)bgSprite thumbMenuItem:(CCMenuItem *)aThumb
{
    if ((self = [super init]))
    {
#ifdef __IPHONE_OS_VERSION_MAX_ALLOWED
        // If the target is an iPhone or an iPad
        self.isTouchEnabled = YES;
#elif __MAC_OS_X_VERSION_MAX_ALLOWED
        // If the target is a mac
        self.isMouseEnabled = YES;
#endif

        // Sets the initial value
        value = 0;

        self.isRelativeAnchorPoint = YES;
        self.anchorPoint = ccp(0.5f,0.5f);

        // 1
        // Sets the background and the thumb sprites
        self.bg = bgSprite;
        self.thumb = aThumb;

        // 2
        // Defines the content size
        CGRect maxRect = CGRectUnion([_bg boundingBox], [_thumb boundingBox]);
        [self setContentSize:CGSizeMake(maxRect.size.width, maxRect.size.height)];

        // Calculate the min and max values
        self.minX = _thumb.contentSize.width / 2;
        self.maxX = _bg.contentSize.width - _thumb.contentSize.width / 2;

        // Add the slider background
        _bg.position = CGPointMake(self.contentSize.width / 2, self.contentSize.height / 2);
        [self addChild:_bg];

        // Add the slider thumb
        _thumb.position = CGPointMake(minX, self.contentSize.height / 2);
        [self addChild:_thumb];
    }
    return self;
}
There are two important things here:
- 1. Sets the background and thumb sprites as instance variables (they are retained!).
- 2. Defines the content size. This will allow the superclass to define when there is whether an interaction on the control.
Ok next up, don’t forgot to override the dealloc method to release the background and thumb sprites:
- (void)dealloc
{
    [_thumb release], _thumb = nil;
    [_bg release], _bg = nil;

    [super dealloc];
}
Cool, we have now cleaned the code.
You may have noticed that there are two portions of codes to manage the user interactions, one for the touch events and an another for the mouse events. However they have exactly the same function, update the value and the thumb sprite position. So now we are going to refactor this to make it more maintainable.
Make the following changes:
// Add into the private @interface
- (void)sliderBegan:(CGPoint)location;
- (void)sliderMoved:(CGPoint)location;
- (void)sliderEnded:(CGPoint)location;

// Add after @implementation

- (void)sliderBegan:(CGPoint)location
{
    [self.thumb selected];

    CGPoint pos = self.thumb.position;
    pos.x = location.x;
    self.thumb.position = pos;

    self.value = (pos.x - minX) / (maxX - minX);
}

- (void)sliderMoved:(CGPoint)location
{
    CGPoint pos = self.thumb.position;
    pos.x = MIN(location.x, maxX);
    pos.x = MAX(pos.x, minX );
    self.thumb.position = pos;

    self.value = (pos.x - minX) / (maxX - minX);
}

- (void)sliderEnded:(CGPoint)location
{
    if (self.thumb.isSelected)
    {
        [self.thumb unselected];

        self.value = (self.thumb.position.x - minX) / (maxX - minX);
    }
}

// Replace ccTouchBegan:withEvent: with the following
- (BOOL)ccTouchBegan:(UITouch *)touch withEvent:(UIEvent *)event
{
    if (![self isTouchInside:touch])
    {
        return NO;
    }

    CGPoint location = [self locationFromTouch:touch];

    [self sliderBegan:location];

    return YES;
}

// Replace ccTouchMoved:withEvent: with the following
- (void)ccTouchMoved:(UITouch *)touch withEvent:(UIEvent *)event
{
    CGPoint location = [self locationFromTouch:touch];

    [self sliderMoved:location];
}

// Replace ccTouchEnded:withEvent: with the following
- (void)ccTouchEnded:(UITouch *)touch withEvent:(UIEvent *)event
{
    [self sliderEnded:CGPointZero];
}

// Replace ccMouseDown: with the following
- (BOOL)ccMouseDown:(NSEvent*)event
{
    if (![self isMouseInside:event])
    {
        return NO;
    }

    CGPoint location = [self locationFromEvent:event];

    [self sliderBegan:location];

    return YES;
}

// Replace ccMouseDragged: with the following
- (BOOL)ccMouseDragged:(NSEvent*)event
{
    if (!self.thumb.isSelected)
    {
        return NO;
    }

    CGPoint location = [self locationFromEvent: event];

    [self sliderMoved:location];

    return YES;
}

// Replace ccMouseUp: with the following
- (BOOL)ccMouseUp:(NSEvent*)event
{
    [self sliderEnded:CGPointZero];

    return NO;
}
The important part here is the isTouchInside/isMouseInside call. These methods are provide by the CCControl superclass and uses the layer contentSize to know if the touch/mouse event is inside the component. So now you can remove the “isTouchForMe:” because we don’t need it anymore.
To finish we are going to fix the problem of timing of the thumb when we move too fast. To fix it make the following changes:
// Replace locationFromTouch: with the following
- (CGPoint)locationFromTouch:(UITouch *)touch
{
    CGPoint touchLocation = [touch locationInView: [touch view]];
    touchLocation = [[CCDirector sharedDirector] convertToGL: touchLocation];
    touchLocation = [self convertToNodeSpace: touchLocation];

    // The fix
    if (touchLocation.x < minX)
    {
        touchLocation.x = minX;
    } else if (touchLocation.x > maxX)
    {
        touchLocation.x = maxX;
    }

    return touchLocation;
}

// Replace locationFromEvent: with the following
- (CGPoint)locationFromEvent:(NSEvent *)event
{
    CGPoint location = [[CCDirector sharedDirector] convertEventToGL:event];
    location = [self convertToNodeSpace:location];

    // The fix
    if (location.x < minX)
    {
        location.x = minX;
    } else if (location.x > maxX)
    {
        location.x = maxX;
    }

    return location;
}
Ok, it’s finished! Now all must work well!
Conclusion
This tutorial has shown you in a first time how to use the CCControl with the CCSlider, and in a second part we have improved the original code to remove some weird behaviours.
I hope this could helps someone. If there’s anything you need, please feel free to put a comment and I will try my best to help you.
You can download the final project on github.
 (2 votes, average: 5.00 out of 5)


Hi there,
Thanks a lot for sharing your work.
I am trying to integrate it to my project, everything seems ok except the following error at compilation in the CCControlStepper class :
– (void)startAutorepeat
{
autorepeatCount_ = -1;
[self schedule:@selector(update:) interval:kAutorepeatDeltaTime repeat:kCCRepeatForever delay:kAutorepeatDeltaTime * 3];
}
It says that kCCreapeatForever is undeclared…
Should i add it manually ?
thank you
Hi,
This is weird. The kCCRepeatForever is define into the Cocos2D file: ccMacro.h. So if the constant is undeclared you should check the link with the Cocos2D framework files.
Best,
Yannick
Thank you very much for your quick answer. The link with cocos2D framework seems ok, but in fact in the version i have, i can see the ccMacro.h, but it’s different from yours, mine doesn’t have this #define
which cocos2d version am i suppose to use ?
Also i’ve seen your working on a gauge (like a life level bar?), i am very interested in it. Can you tell me when you release it please ?
thanks a lot!
max
Me again, sorry, if i set the missing value to -1, then the linker complains like this :
Ld /Users/max/Library/Developer/Xcode/DerivedData/Killer-gukozhsbiifcbddnuobdqnfbnpyz/Build/Products/Debug-iphoneos/Killer.app/Killer normal armv7

    cd /Users/max/Documents/workspace/Killer

    setenv IPHONEOS_DEPLOYMENT_TARGET 5.0

    setenv PATH "/Applications/Xcode.app/Contents/Developer/Platforms/iPhoneOS.platform/Developer/usr/bin:/Applications/Xcode.app/Contents/Developer/usr/bin:/usr/bin:/bin:/usr/sbin:/sbin"

    /Applications/Xcode.app/Contents/Developer/Toolchains/XcodeDefault.xctoolchain/usr/bin/clang -arch armv7 -isysroot /Applications/Xcode.app/Contents/Developer/Platforms/iPhoneOS.platform/Developer/SDKs/iPhoneOS5.1.sdk -L/Users/max/Library/Developer/Xcode/DerivedData/Killer-gukozhsbiifcbddnuobdqnfbnpyz/Build/Products/Debug-iphoneos -F/Users/max/Library/Developer/Xcode/DerivedData/Killer-gukozhsbiifcbddnuobdqnfbnpyz/Build/Products/Debug-iphoneos -filelist /Users/max/Library/Developer/Xcode/DerivedData/Killer-gukozhsbiifcbddnuobdqnfbnpyz/Build/Intermediates/Killer.build/Debug-iphoneos/Killer.build/Objects-normal/armv7/Killer.LinkFileList -dead_strip -lz -miphoneos-version-min=5.0 -framework MediaPlayer -framework QuartzCore -framework OpenGLES -framework OpenAL -framework AudioToolbox -framework AVFoundation -framework UIKit -framework Foundation -framework CoreGraphics -o /Users/max/Library/Developer/Xcode/DerivedData/Killer-gukozhsbiifcbddnuobdqnfbnpyz/Build/Products/Debug-iphoneos/Killer.app/Killer
ld: duplicate symbol _OBJC_METACLASS_$_Utils in /Users/max/Library/Developer/Xcode/DerivedData/Killer-gukozhsbiifcbddnuobdqnfbnpyz/Build/Intermediates/Killer.build/Debug-iphoneos/Killer.build/Objects-normal/armv7/Utils-C34FAB685B5D5C69.o and /Users/max/Library/Developer/Xcode/DerivedData/Killer-gukozhsbiifcbddnuobdqnfbnpyz/Build/Intermediates/Killer.build/Debug-iphoneos/Killer.build/Objects-normal/armv7/Utils-D1FF8EF8676A7360.o for architecture armv7
clang: error: linker command failed with exit code 1 (use -v to see invocation)
Any idea ?
Thank you very much
This is solved : i had twice the same Utils class in my project
Great! Glad to hear that!
Thanks, but the first problem is still there unfortunately…
How to use color picker control??? I am working on coloring sketch book project… i wanted to use this color picker control? do you have any sample example of how to use it?
Hi,
Yes you can donwload the samples into the github repo. There is an example which uses the color picker. It is not really easy to custom for the moment because you’ll need to create a sprite-sheet with (if possible) the same sizes.